⌘K
Sites
How to Access
Log in to the web application > go to the left menu > click on Site Management > select Sites > click on the Add Site button.
Steps to Create a Site
- Site Name* – Enter the full name of the construction site.
- Site Type* – Select from the dropdown (e.g., Renovation, Industrial, Infrastructure, Construction Site).
- Short Name – Enter a short identifier for the site.
- Map* – Define the site boundaries by connecting points on the map (create a rectangle, polygon, etc.).
- Address – Enter the detailed address of the site.
- Description – Provide additional details about the site.
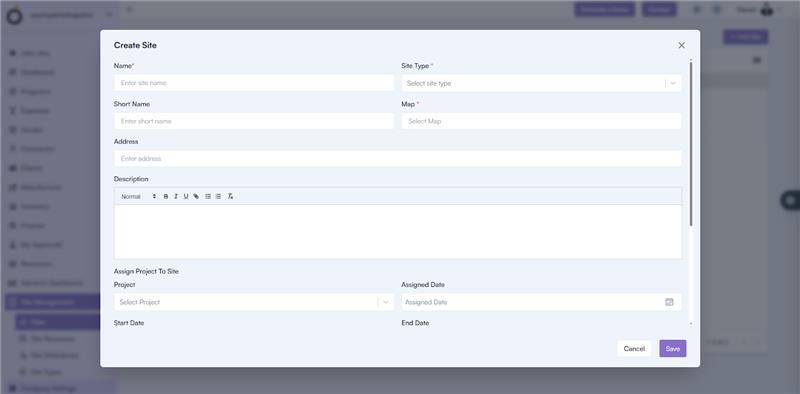
Assign Project to Site
- Select Project – Choose the project(s) associated with this site.
- Assigned Date – Date on which the project was assigned to the site.
- Start Date / End Date – Define the duration for project execution at this site.
- Notes – Add remarks or any relevant site-related notes.
If multiple projects need to be assigned to the same site, click on the + icon to add more.
Click Save to create the site successfully.
The created sites appear in the Site List, displaying their key details.