Task Creation Process
Purpose of a Task
Tasks are the smallest units in the project hierarchy and are created to achieve specific milestones or project objectives.
Accessing Tasks
Tasks can be created in two ways:
- Under a Project: Tasks can be created for a specific project.
- Under a Milestone: Tasks can also be created directly within a milestone.
Task Creation Process
1. Creating a Task Under a Project
- Login to your account.
- Navigate to the left menu and click on the Project Name.
- In the project-related information, locate and click on Tasks to open the Task Page.
- Click on the + Create Task button to open the Task Creation Popup.
- Fill in the required details:
- Task Title (mandatory): Enter the task name.
- Task Type: Specify the type of task.
- Add Milestone: Select a milestone from the dropdown.
- User Group: Choose the user group responsible for the task.
- Assign To: Assign the task to a specific team member.
- Start Date and Due Date: Specify the task’s timeline.
- Description: Add any additional details about the task.
- Click the Save button to create the task.

2. Creating a Task Under a Milestone
- Navigate to the Milestone Details Page.
- Click on the Add Tasks button to open the Task Creation Popup.
- Fill in all the required details as mentioned above.
- Click Save to create the task.
Task Details Page
The Task Details Page displays all the information provided during the task creation process.
It also includes the following additional features:
- Subtasks: Add smaller tasks under the main task.
- Checklist: Create and track specific checklist items.
- Activity: View the activity log related to the task.
- Links: Add related links or references to the task.
- Manual Time Entry: Log the time spent manually on the task.
Subtask Creation
Subtasks help divide a task into smaller, manageable parts.
Steps to Create a Subtask:
1. Click on the project name in the left menu to view project-related information.
2. Select “Tasks” from the left menu.
3. Click on a task name to open the Task Details page.
4. Navigate to the Subtasks tab.
5. Click on the Add Task button.
6. Fill in the required details:
- Task Title*
- Task Type
- Add Milestone (from the milestone dropdown)
- User Group
- Assign To
- Start Date
- Due Date
- Description
- Save to create the subtask.
Checklist Creation
A checklist is used to itemize smaller steps within a task.
Steps to Create a Checklist:
- Click on the project name in the left menu to view project-related information.
- Select “Tasks” from the left menu.
- Click on a task name to open the Task Details page.
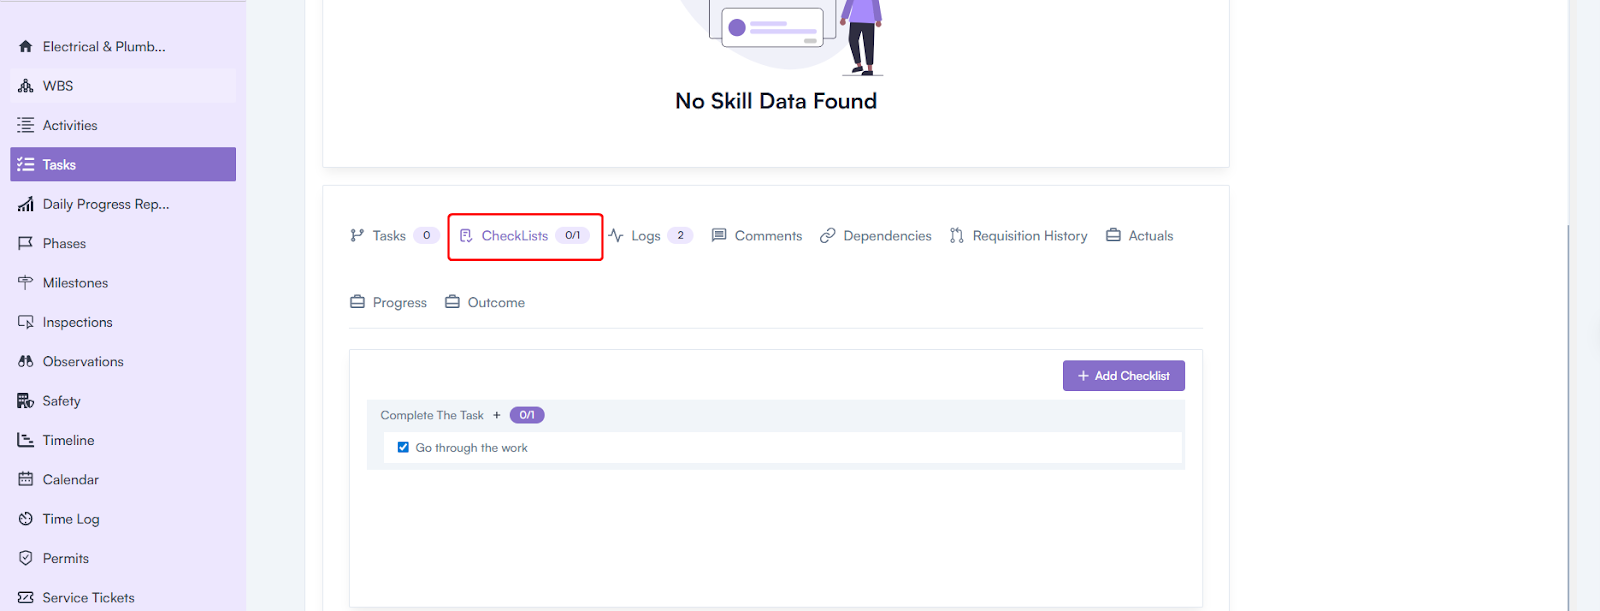
- Navigate to the Checklists tab.
- Click on the Add Checklist button.
- Enter the checklist title.
- Click on Add to save the checklist.
Activity Log
The Activity tab tracks task-related actions, including updates and changes, along with timestamps.
How to View Activity Log:
- Click on the project name in the left menu to view project-related information.
- Select “Tasks” from the left menu.
- Click on a task name to open the Task Details page.
- Navigate to the Activity tab.
- Review task-related actions, such as:
- Task created by whom?
- Task updated by whom.
- Date and time of each action.

Task Linking
Task linking is used to establish dependencies between tasks.
How to Link Tasks:
- Click on the project name in the left menu to view project-related information.
- Select “Tasks” from the left menu.
- Click on a task name to open the Task Details page.
- Navigate to the Links tab.
- Click on the Add Link button.
- In the Add Task Link popup:
- Select the Link Type* (e.g., dependency).
- Choose the task to be linked.
- Save the changes.
Note: If a task is linked to another, the second task cannot begin until the first task is completed.
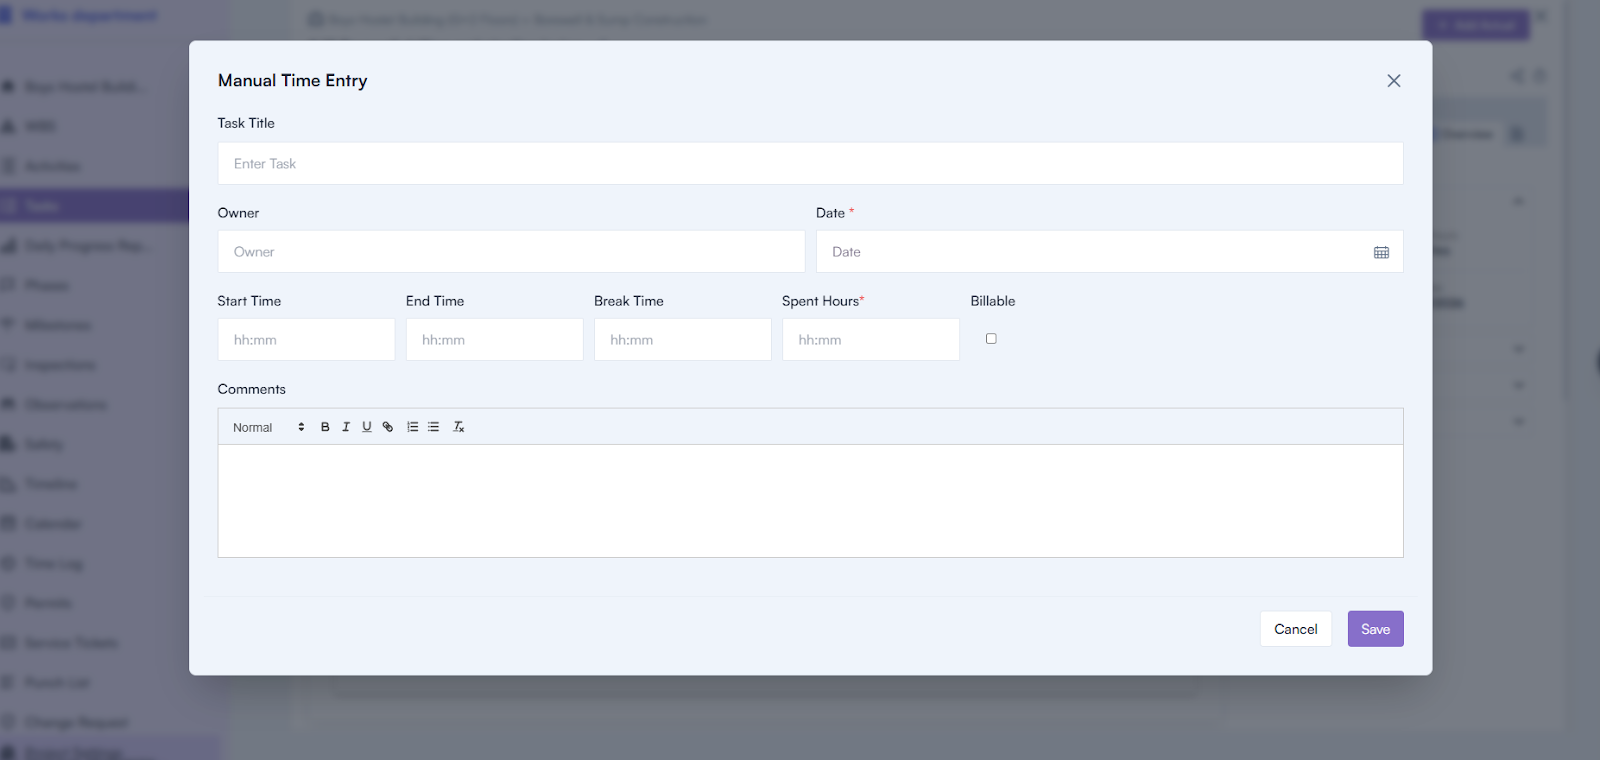
Manual Time Entry
Manual time entry is used to log time spent on a specific task.
How to Create Manual Time Entry:
1. Open the Task Details page for the specific task.
2. In the header section, click on the Time Entry icon.
3. Fill in the details in the Manual Time Entry pop-up:
- Task Title (auto-filled).
- Start Time
- End Time
- Break Time
- Spent Hours
- Billable (if applicable).
- Comments
4. Click on Save to log the time entry.
Milestone Linking
Milestone linking is used to create dependencies between milestones.
How to Link Milestones:
- Click on the milestone name to open the Milestone Details page.
- Navigate to the Links tab.
- Click on the + Add Link button.
- Select the milestone(s) to be linked as dependent.
- Ensure that the immediate next milestone is assigned to a different contractor (if applicable).
- Save the changes.
Note: Linked milestones ensure that one milestone cannot begin until the preceding milestone is completed.