Project Module
The Project Module is a central feature in construction project management that allows users to create, organize, and manage individual projects within a workspace. Each project can function independently or be associated with a broader program to ensure coordinated planning, budgeting, and progress tracking.
Overview
A Program in construction management represents a collection of related projects managed together to achieve a shared goal.
Projects are temporary, goal-oriented efforts designed to deliver specific outcomes, such as constructing a building or completing a development phase.
Projects can be:
- Created directly under a workspace.
- Optionally associated with a Program.
Navigation Options:
- Clicking on a Program Name redirects to the Project Page.
- Clicking on the Organization Name in the left menu redirects to the Create Project Page.

Steps to Create a Project
- Navigate to the Project Page.
- Click on the Create Project button located in the top-right section.
- Fill in the project details in the pop-up form:
- Program Name: Select from dropdown (optional).
- Upon selection, the Budget and Budget Amount fields appear only if a budget is linked to the chosen program.
- Parent Project: Select from dropdown (optional).
- Project Name: Enter a unique project name (mandatory).
- Organization Name: Select from the dropdown.
- Priority: Choose the project’s priority level (mandatory).
- Start Date: Pick the project’s start date (mandatory).
- End Date: Pick the project’s end date (optional).
- Upload Files: Attach any project-related documents or reference files.
- Description: Add additional details or context about the project (optional).
- Program Name: Select from dropdown (optional).
- Click Save to create the project.
Functionalities on the Project Page
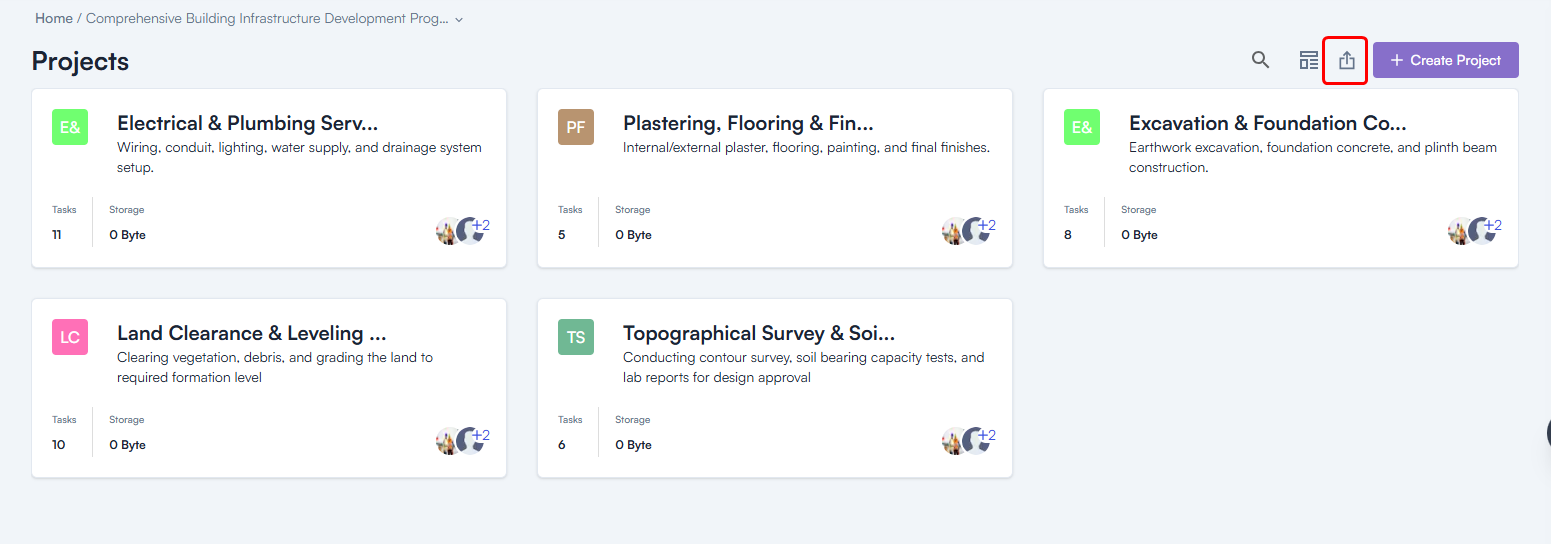
1. Export Projects
- Steps :
- Click on the Export Icon in the header section.
- Select a project from the All Projects dropdown.
- Click the Export button to download project data.
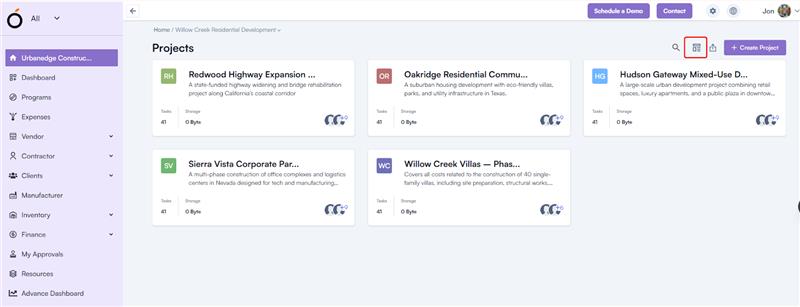
2. Create Project Templates
Steps:
- Log in to the application and go to the Project Overview Page.
- Click on the Template Icon in the header.
- The system redirects to the Template Page.
- Click Create Template to design a new project template.
- Clicking a created template card redirects to the Template Overview Page, where users can create a project from an existing template.
Project Overview
Access:
Click on any project name to navigate to the Project Overview Page.
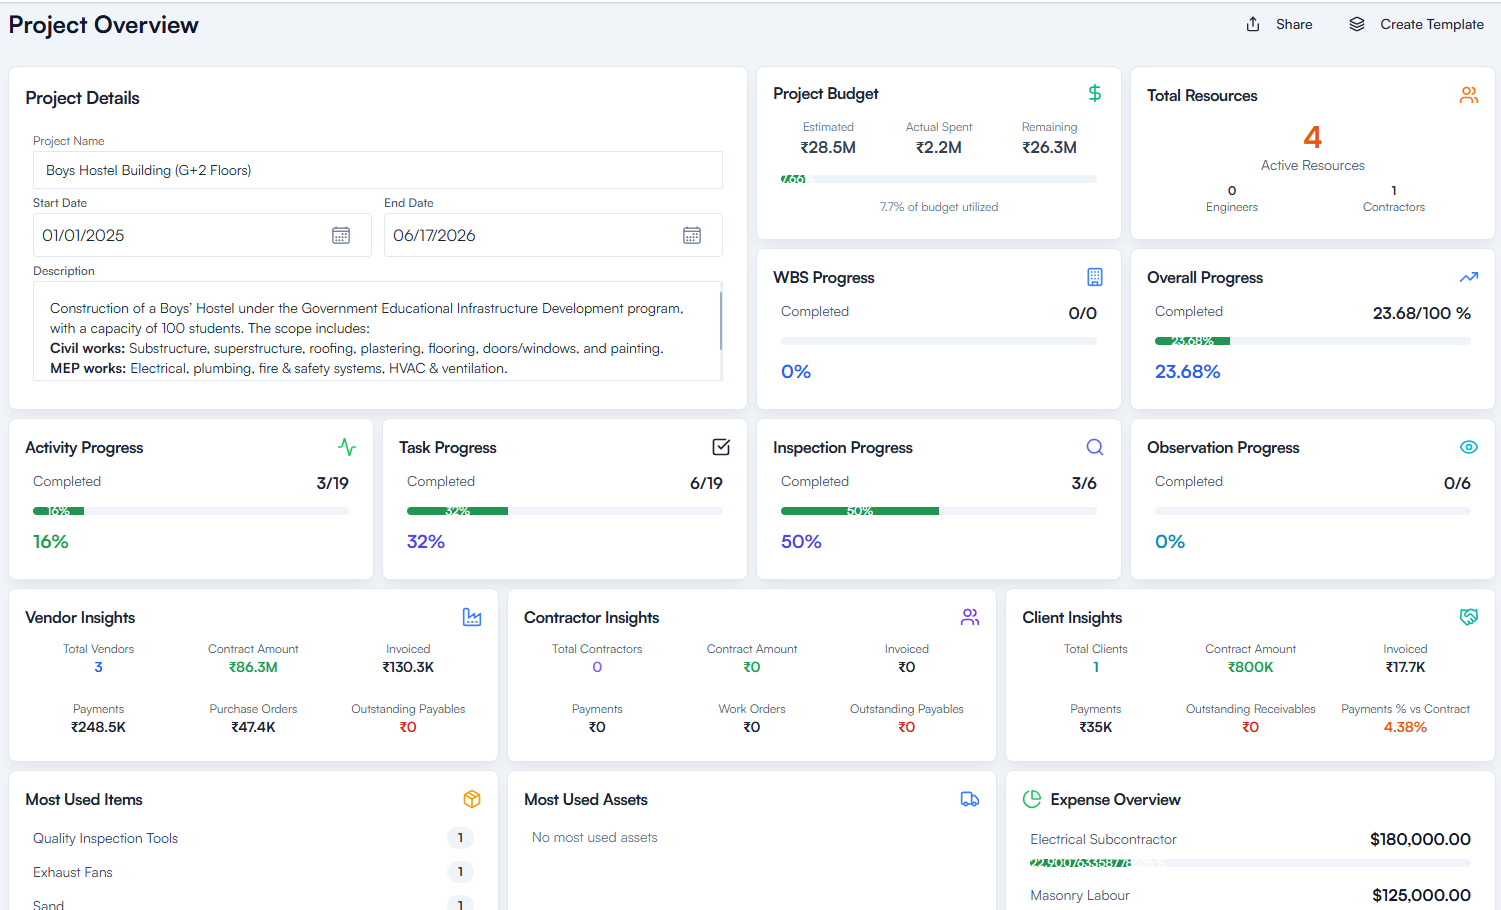
Details Displayed:
1. Basic Information
Displays the fundamental details of the project, helping users quickly identify its core attributes.
- Project Name
- Start Date
- End Date
- Project Description
2. Project Budget
Provides a clear view of the project’s financial status, including estimated, actual, and remaining costs.
- Estimated Cost
- Actual Cost
- Remaining Cost
- % of Budget Utilized (displayed in a budget summary card)
3. Resources
Shows the total number of resources allocated to the project for efficient manpower management.
- Total Resources assigned to the project
4. Progress Tracking
- WBS Progress
- Overall Progress
- Activity Progress
- Task Progress
- Inspection Progress
- Observation Progress
5. Vendor Insights
Provides key financial and performance indicators related to vendors.
- Total Vendors
- Contract Amount
- Invoiced Amount
- Payments Made
- Purchase Orders
- Outstanding Payables
6. Contractor Insights
Shows financial and contractual data related to all engaged contractors.
- Total Contractors
- Contract Amount
- Invoiced Amount
- Payments Made
- Work Orders
- Outstanding Payables
7. Client Insights
- Total Clients
- Contract Amount
- Invoiced Amount
- Payments Received
- Outstanding Receivables
- Payments % vs Contract (performance ratio)
8. Most Used Items
- Displays Top 5 Most Used Items
9. Most Used Assets
- Displays Top 5 Most Used Assets
10. Expense Overview
- Summary of all project-related expenses and allocations
11. Project Insights
- Highlights Upcoming Activities and Delayed Tasks for proactive tracking