⌘K
Program Module
The Program Module enables users to create, manage, and monitor programs efficiently within their workspace.
Overview
The Program module provides a centralized interface to organize multiple projects under one strategic program, define budgets, set priorities, assign responsibilities, and track progress through a visual dashboard.
Steps to Create a Program
- Log in to the application.
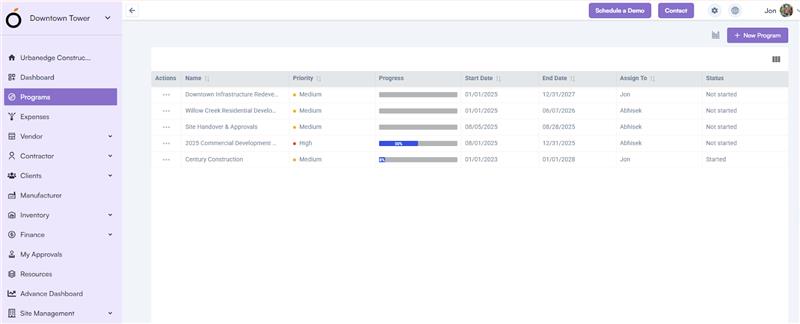
- Navigate to the left menu → Program.
- Click on the “New Program” button.
- Fill in the following required fields:
- Program Name: Enter a unique program name.
- Organization: Select the organization from the dropdown list.
- Start Date: Choose the start date for the program.
- End Date: Choose the end date for the program.
- Priority: Set the program’s priority level (e.g., High, Medium, Low).
- Assign To: Select the responsible team member.
- Budget: Choose a predefined budget.
- Budget Amount: This field auto-fills based on the selected budget.
- Click “Save” to create the program.
Users can edit or delete a program by clicking the three-dot (kebab) menu beside the program entry.
Program Dashboard View
To access the Program Dashboard View:
- Log in to the application → Go to the left menu → Program → Enable Dashboard View (located beside the New Program button).
The dashboard displays key performance indicators (KPIs) and visual insights, including:
- Total Programs
- Total Budget
- Total Overdue Programs
- Budget Utilization
Additionally, the dashboard includes:
- Expense Summary by Program
- Actual Budget vs. Actual Spent (comparison chart)
- Program Progress (displayed in graphical chart format)