Account Setup
OConstruction offers a seamless onboarding experience through our dedicated team.Interested users who want to use the OConstruction product must reach out to our sales team.The core team will set up an account for the user.
Once the account is created, the user can log in using their email and password.
After logging in, the user can add additional members to their organization through the Configuration section under Company Settings.
Logging In
- Access the Login Page:

Log In:
- Enter your registered email address.
- Enter the password you created during sign-up.
- Click the “LogIn” button.
Configuration
The Configuration section in the application is divided into three main parts:
- Profile Settings
- Company Settings
- Project Settings
Profile Settings
Steps to Access Profile Settings:
- Login to the web application using your email & password.
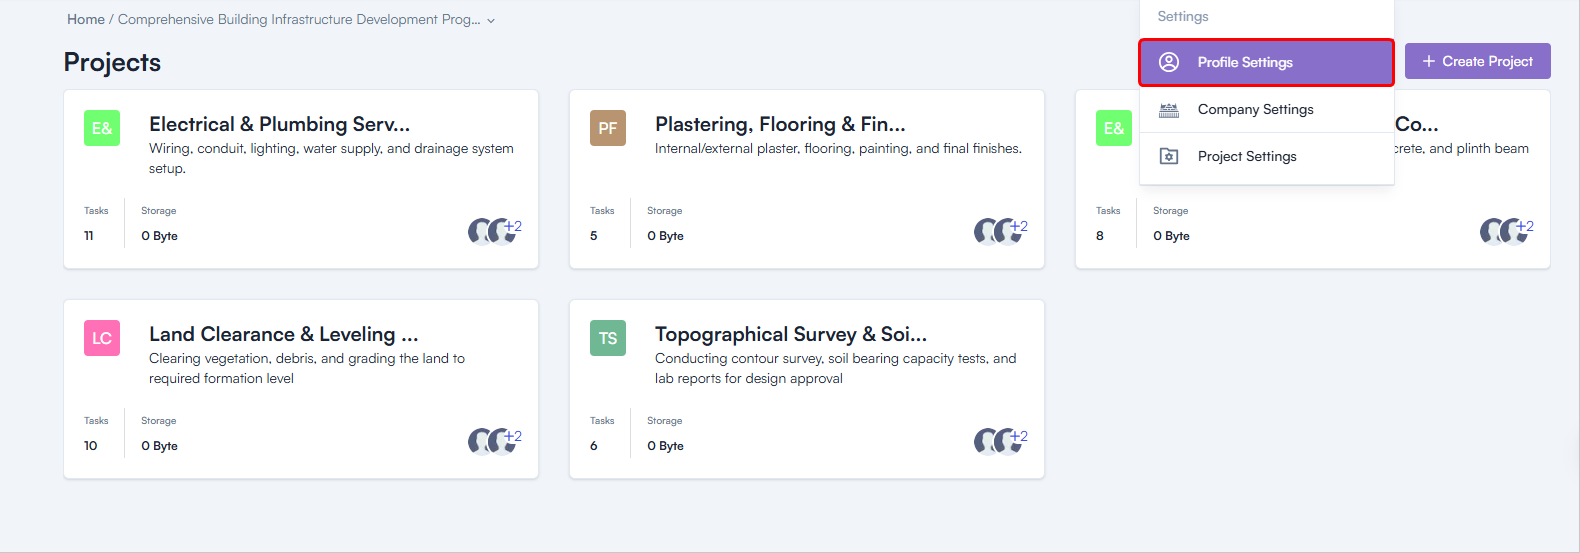
- Go to the Header Section.
- Click on the Settings Icon.
- Click on Profile Settings.
Profile Settings Sections:
- My Profile
- Change Password
- Workspace
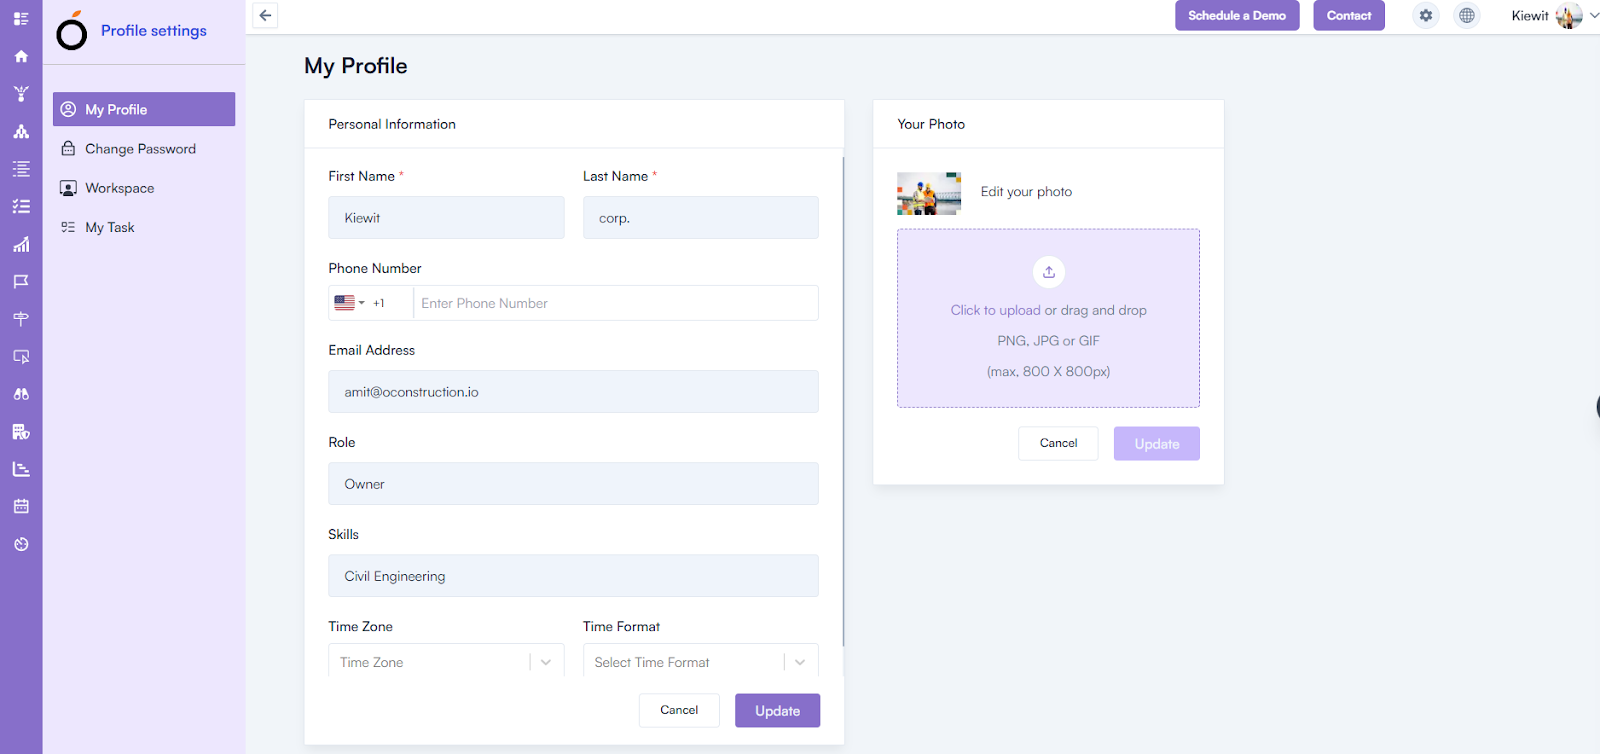
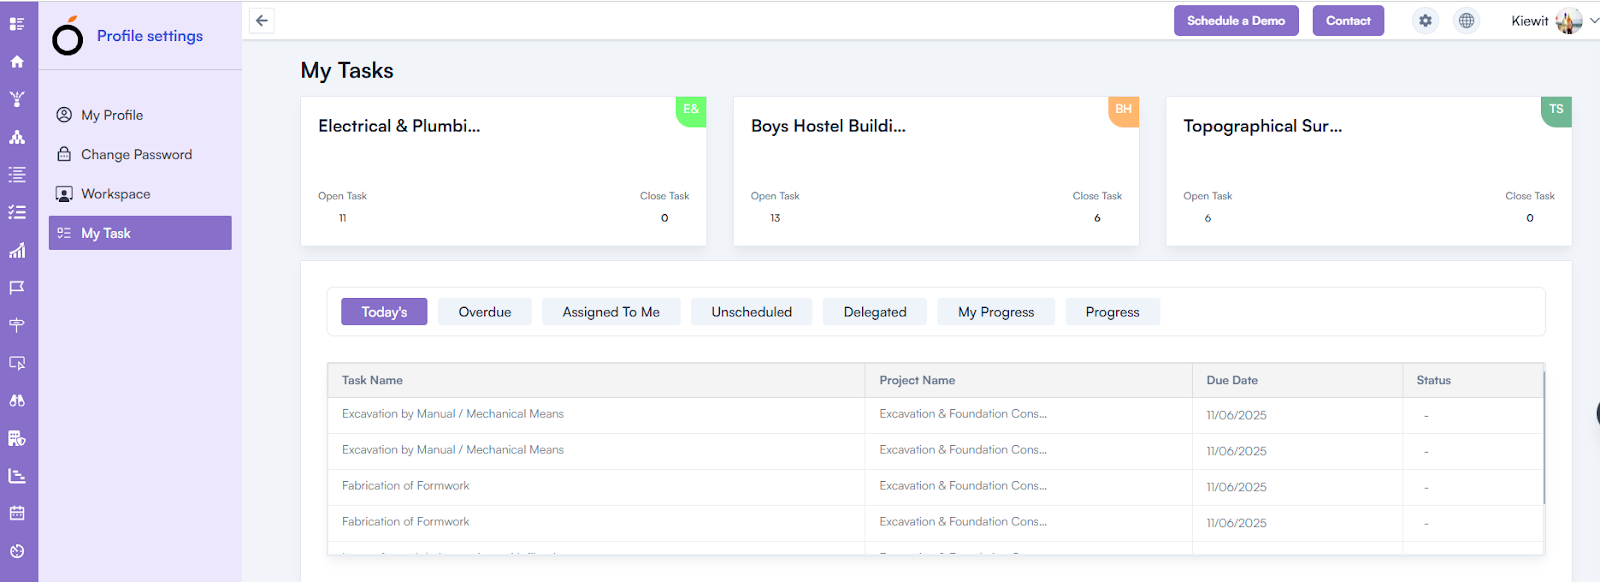
My Profile
To access My Profile:
- Go to Profile Settings.
- In the Left Menu, click on My Profile.
- Displays all personal information related to the logged-in user:
- First Name*
- Last Name*
- Phone Number
- Email Address
- Role
- Skills
- Time Zone
- Time Format
- Upload a Profile Picture
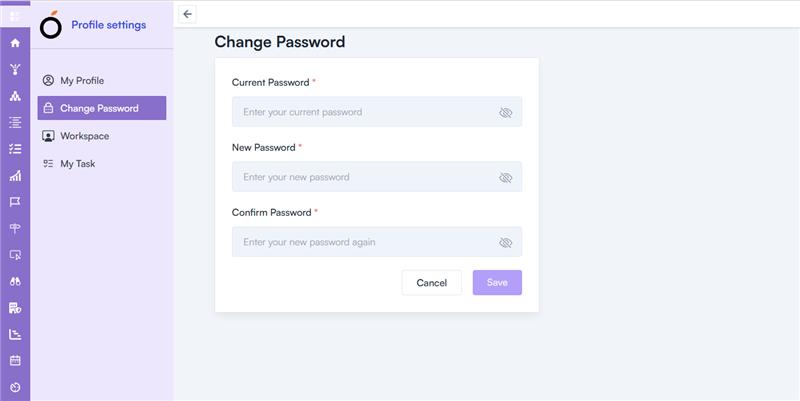
Change Password
To change the password:
- Go to Profile Settings.
- In the Left Menu, click on Change Password.
- Enter the following details:
- Current Password*
- New Password*
- Confirm Password*
- Click on Save to update the password.
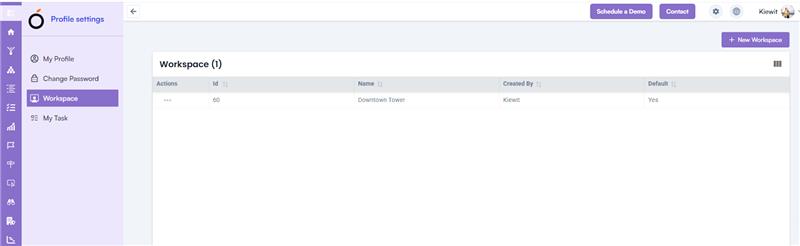
Workspace
To add a new workspace:
- Go to Profile Settings.
- In the Left Menu, click on Workspace.
- In the Header Section, click on the New Workspace button.
- Enter the Workspace Name.
- Click on Save.
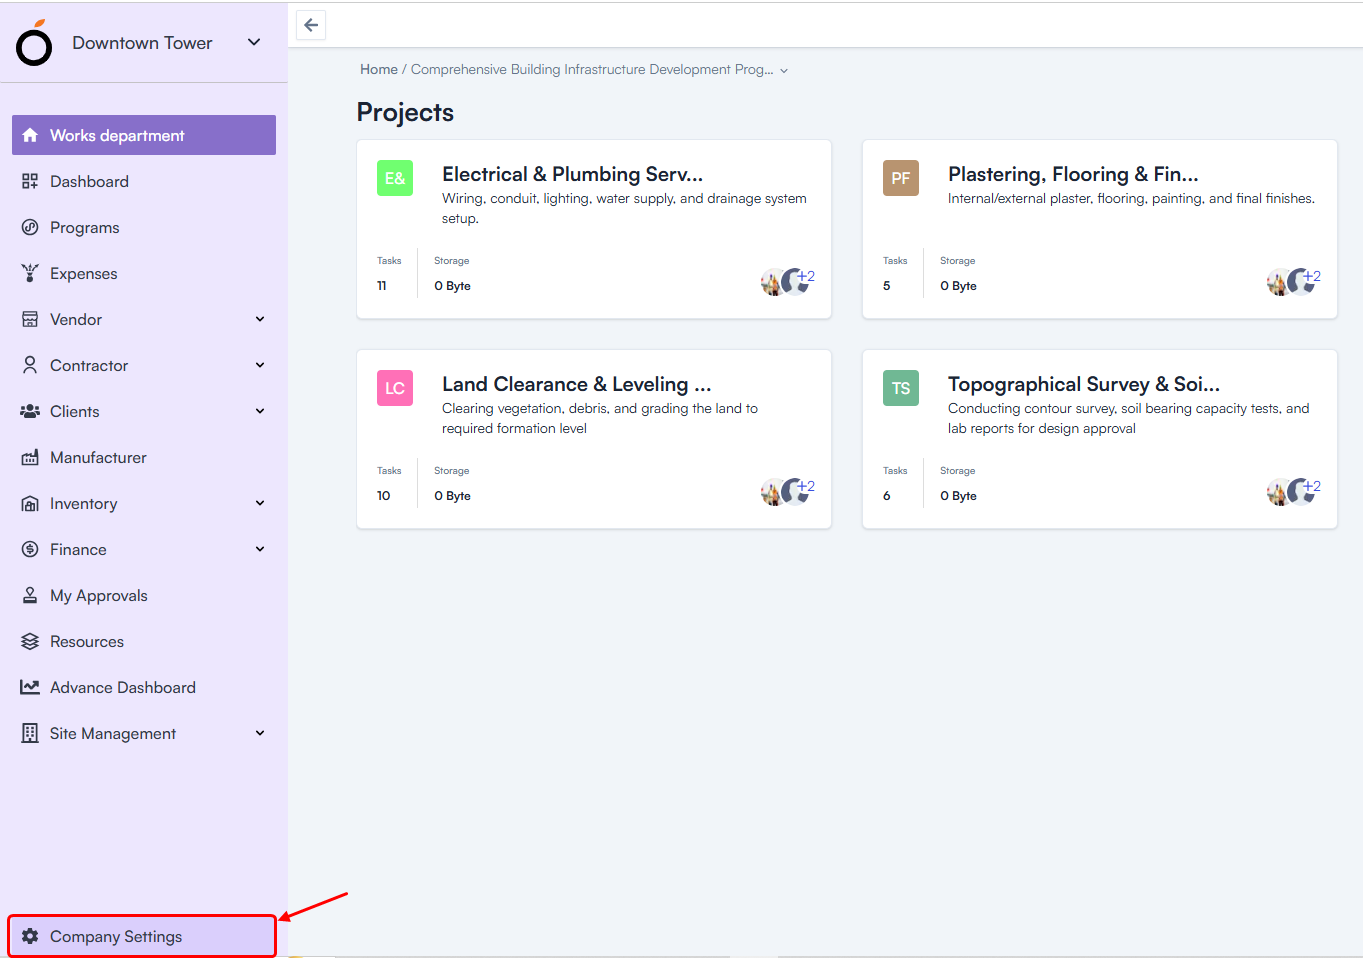
Company Settings
The Company Settings can be accessed in two ways:
- From the Left Menu
- From the Header Section (Settings Icon)
Accessing Company Settings:
Method 1: Left Menu
- Log in to the web application using your email & password.
- In the Left Menu, click on Company Settings.
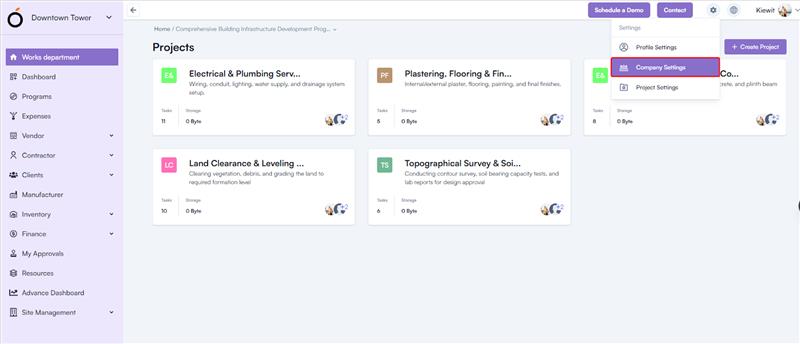
Method 2: Header Section (Settings Icon)
- Log in to the web application using your email & password.
- Go to the Header Section.
- Click on the Settings Icon.
- Click on Company Settings.
Inside Company Settings:
1. General Settings
Overview: Displays all information related to the organization, including:
- Organization Name
- Website
- Contact Number
- Currency
- Description
- Organization Owner
Import Project: Allows importing of projects into the system.
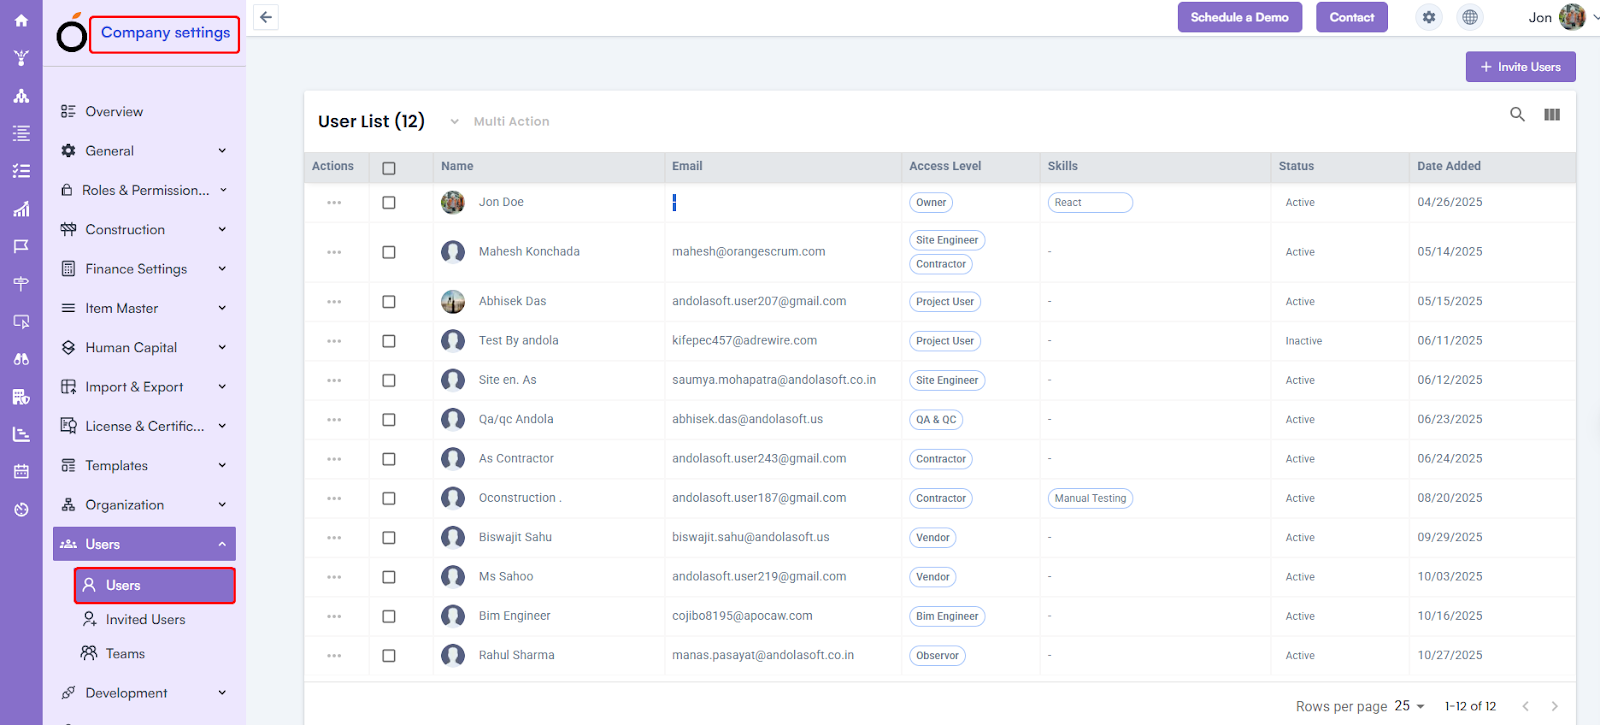
2. Users Management
Users
The Users section is used to invite new users to the organization.
Steps to Invite a User:
- Go to Company Settings.
- Click on the Users dropdown.
- Click on Users.
- In the Top Right Section, click on the Invite User button.
- Fill in the required details:
- First Name*
- Last Name*
- Email Address*
- Access Level
- Click on Invite.
- The invited user will receive an email from the organization.
- They can log in to the application using the invitation link.
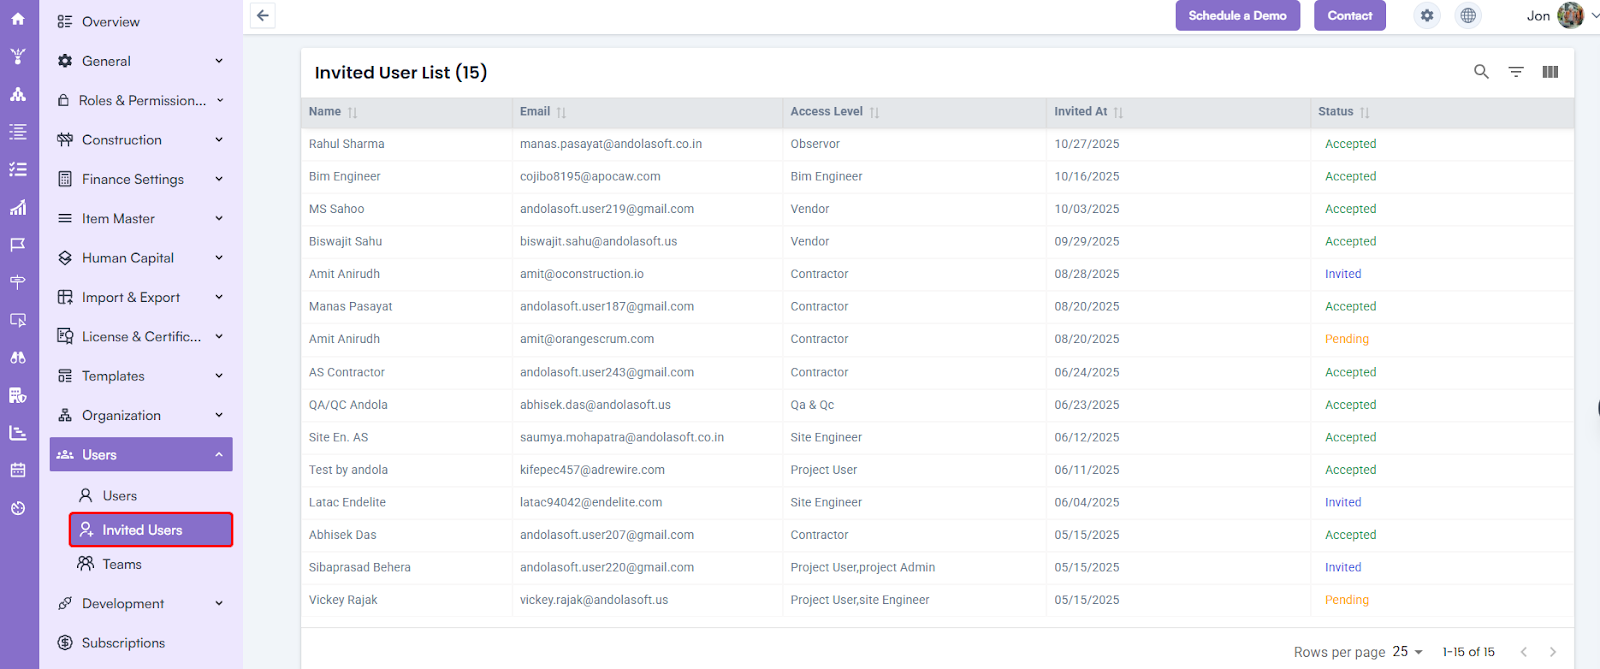
Invited Users
- Displays the list of all invited users.
- To access:
-
- Go to Company Settings.
- Click on the Users dropdown.
- Click on Invited Users.
User Group
The User Group section is used to organize invited users into groups.
Steps to Create a User Group:
- Go to Company Settings.
- Click on the Users Dropdown.
- Click on User Group.
- In the Top Right Section, click on the Create Group button.
- Enter a Group Name.
- Click on Save.
Adding Members to a User Group:
- Click on the Group Name.
- Add members to the group.